Monday, January 3, 2022

Temperature and Humidity over the years

Staring at the data

With the EWI now complete and the MVHR humming away, it is time to see what effects these improvements have had on the indoor climate.

The Sensors

In 2016, we bought a Nest smart thermostat. Amongst other things, this device has a temperature (T) and relative humidity (RH) sensor built in, and somebody somewhere created a script that could poll the Nest for T and RH data at regular intervals. Unfortunately the script stopped working when Google (bought Nest and) updated their authentication protocols.

In 2019 I rigged up a modular system. It consists of low-power nodes that read out a factory calibrated SHT-31 sensor every 20 (or so) minutes, and transmit the T,RH data to a central receiving node that displays the data and logs it to SD card.

The State of the House, thermally

In 2016, the main thermal elements of the house still were pretty much as we bought it: 50mm mineral wool cavity wall insulation, uninsulated floors, no internal wall insulation. The original 100mm mineral wool in the loft was topped up to 150mm. Since, then, the following improvements were made:
  • July 2017, building works for the extension commenced. The estimated heat loss would not change much because of this: the super-insulated extension would, as a whole, lose as much heat as the area of the external wall it covers. It did include replacing the kitchen floor with a super-insulated screed floor with underfloor heating (UFH)
  • August 2018: 200mm polystyrene (EPS) external wall insulation (EWI) was added to the rear and side of the house, including 100mm from DPC level down to the footings. The basecoat and  render finish took many more months to complete!
  • December 2018: the living room was converted: back boiler removed, chimney flue blocked up, suspended timber floor replaced by super insulated screed floor. New condensing boiler installed with weather compensation controls, driving the ground floor UFH directly.
  • April 2020: MVHR installation complete, switched on on 6/4/20. Final commissioning and fine tuning a month or two later. Chimney vents were blocked.
  • October 2020: Finished adding 50mm PIR insulation between rafters in the loft. Chimney channels blocked off using stuffed bin bags and vents added just above. Roof space airtightness is still sub par as the party wall is not sealed.
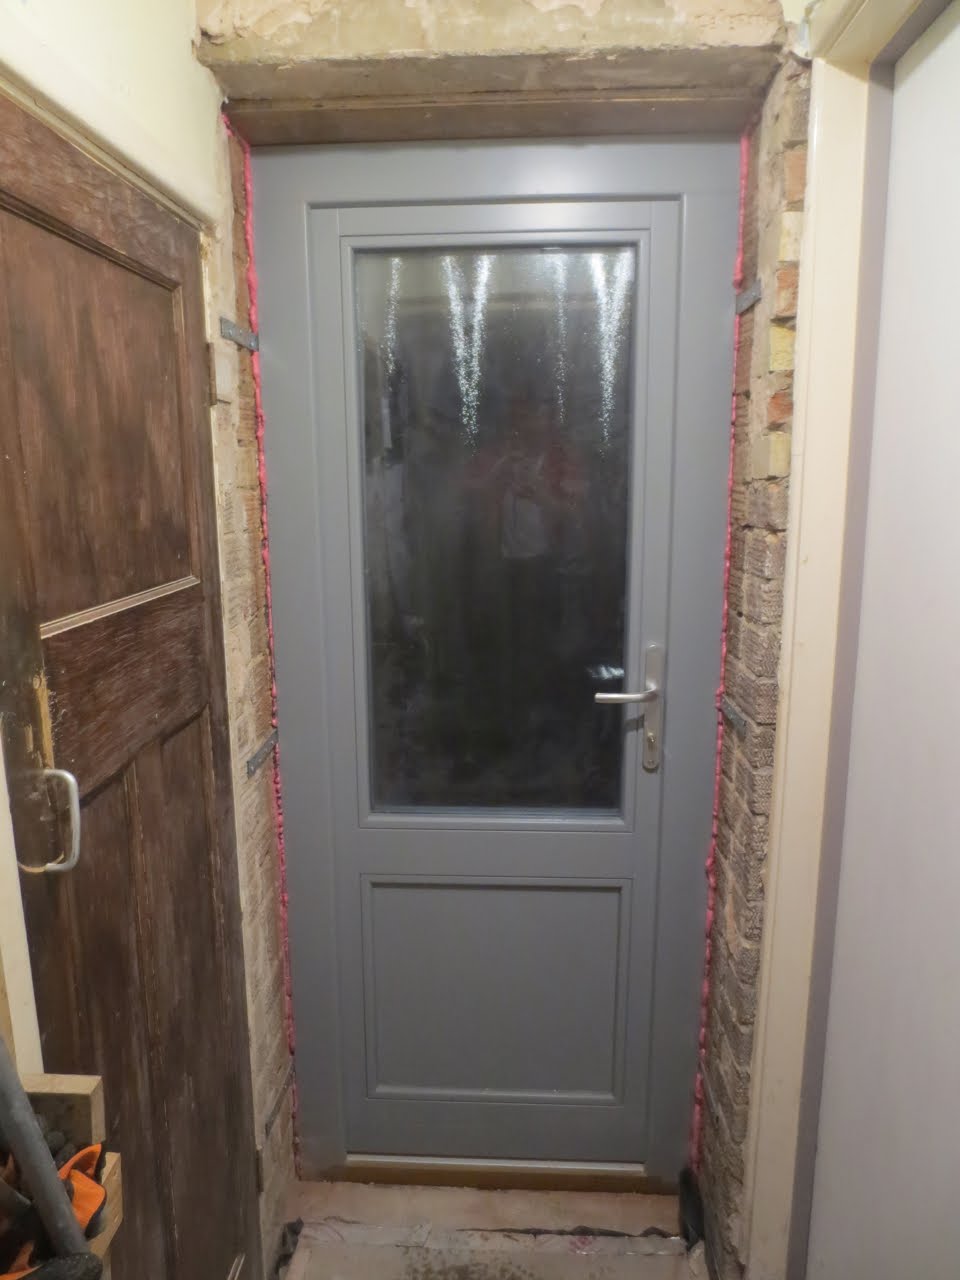
  • June 2021: Completed replacing the windows and door at the front of the house, and adding 200mm EPS EWI, including 150mm below DPC. Again, the finishing took many months more to complete.

The Data

First the temperature. The 2016-2020 (up to March 2020) data looked very similar and was averaged, and the same goes for the March 2020- December 2021 data.
I initially found it a bit surprising that the average temperatures in the winter months had not changed even though a lot of insulation was added over the years. Only when improvements to airtightness were made and the MVHR came online the average winter temperatures improved. It goes to show that if there is no provision for ventilation so that cold air has to be let in in winter, comfort cannot be improved: even well insulated homes need MVHR to increase comfort levels. What did change with the added insulation is the energy required for heating to the same temperatures as before:

It clearly shows the massive drop in energy consumption after adding the EWI, even when only partially applied. The still large drops thereafter are mostly due to the boiler replacement ('18-19) and MVHR ('20-'21).
One of the things that struck me when starting to read the Nest data was the unhealthily high humidity in our house. Despite it being quite draughty with the many wall vents, the humidity was too high all year round, dipping only to barely acceptable levels at the height of summer when all windows are open.
Here again, the MVHR made the difference, notably when there is a big temperature difference between inside and outside, not so much otherwise.

With the front of the house now properly insulated, I expect another substantial drop in heating requirement for 2021-2022. After that, the gains are mainly to be had by improving airtightness: reducing infiltration and make the MVHR run more efficiently.
... to be continued ...

Thursday, July 4, 2019

Hello there

Let me introduce myself for a bit: my name is Bart Hommels, and I live in Coton, a village just west of Cambridge. I am married to Rose, and we have a daughter named Ronja.

I work as an applied physicist at the Cavendish Laboratory, working on instrumentation for particle physics experiments.

I guess the Mr. Maker part of me is never switched off, as I like to make, mend and create things, both at work and in my free time.

Other things I like are outdoors activities: running, cycling and (almost) anything mountains - unfortunately not much of those around in Cambridgeshire.

When we bought our house, we knew it would require a lot of work to bring it up-to-date. After getting an electricity consumption meter, I got very interested in ways to reduce the energy demand of the house.
Soon after realising the potential of renewable energy, we decided to do what many others did at the time and we got solar panels installed: optimising the supply instead of reducing demand.

The thermal performance of house was addressed later: a year or two ago we decided to extend the house, as it was (is) generally quite small. I wanted this to be a starting point of a house-wide thermal upgrade instead of an add-on that would increase energy usage.
As I easily take many things too seriously, we embarked on a long eco-upgrade project. This is by no means completed, and hopefully I get to writing a few blog posts on what it all entails, and my random related ramblings on the subject.


Saturday, June 29, 2019

Improving weather compensation for heating controls?

With the winter now only a distant memory it is time to make up the balance about the new boiler.
The system has worked very well. Boiler operation has been very silent, and due to the large thermal mass of the 80mm thick screed surrounding the underfloor heating (UFH) pipes there has been no short-cycling or intermittent firing whatsoever, and temperature in the house was very constant. According to the specifications, the boiler efficiency should be around 95% in this configuration!
The separate zone for the upstairs worked fine as well. I have to sort out the best location for the Nest thermostat so it does always register people upstairs and asks for heat if needed.

The thing that needed twiddling was the heating curve, and I realised that this is not easily done in a highly insulated, high thermal mass building. According to an online simulator, the temperature profile, and thus the rate of heat loss, for a wall build-up with U=0.15 W/m2K or better, takes in the order of 5-6 hours to settle. In addition to that, from experience it takes 2-3 hours to heat up the screed floors by a couple of degrees, so the time delay is about 8 hours in total! Even in the midst of winter, outside temperatures are hardly ever constant on that timescale, so firstly adjustments to the heating curve have to be small and on a best guess basis, and secondly the weather compensation is always out of step with reality.

The other side effect, and this is most prominent in the shoulder months when there is already considerable solar gain heating the inside of the home, is that when the boiler gets switched on in the morning, it senses a low outside temperature, fires up and starts running the UFH needlessly as the internal temperature is already at the desired level. The boiler then usually switches off an hour later when outside temperatures have risen sharply.

The above could be mitigated by a weather compensation system that does not read the actual temperature, but reads the forecasted temperature (of an on-line weather forecasting service), by a (adjustable) number of hours ahead, reflecting the heating & settling time of the building. The look-ahead time is governed mainly by the degree of insulation and amount of thermal mass present, and could in principle be estimated.

Of course it would be better to have a more advanced solution where a full thermal model of the building is simulated to estimate the current heat demand based on the thermal masses present, insulation values, current internal and forecasted external temperatures, however this might prove too complex and thus unaffordable as a solution for domestic heating. An internet search revealed two student projects of this kind, trying to arrive at better heating controls for two buildings housing faculties of computer science using machine learning and artificial intelligence.

The proposed solution using a fixed "look-ahead" time would benefit all types of heating systems that currently can be controlled using weather compensation controls. It would be particularly beneficial for heat pumps as these are most efficient when run continuously, with a slowly varying load.

Friday, December 14, 2018

What is the worst retrofit heating option?

So with the old GlowWorm Back Boiler Unit 45/4, including its swank Miami Fire Front with fake teak details now replaced by a modern boiler, it is time to ask myself whether I have made the right choice....? Not in time surely as it would have been better to think this through before getting a new heating system installed.

Retrofitting is of course different from building anew. Most existing houses have a wet central heating system fitted with a boiler of some kind: close to a mile of carefully folded & soldered pipework hidden in the ceiling void and a few radiators here and there. When building, say, a new passivhaus there are savings to be made by not having this. But not for retrofit, so let's use what is there already.

Making a few guesstimates, I think that our retrofit will end up somewhere between AECB and EnerPhit. Probably a smidge better insulated and airtight than AECB, but realistically the <1.0 AC/h airtightness required for EnerPhit will be a massive challenge requiring a lot of obsessing about.

Anyway, about heating costs. Let's consider the PassivHaus heating demand limit as well if only for fun. The house has 80 m2 of treated surface, and current Ecotricity pricing for a kWh of electricity is 17.66p, with 3.97p for a kWh of gas, with the standing charge for the latter being £ 89.72 per year. 

Taking the old back boiler out,  running new pipes, electrics and controls costs £ 2500 before anything new & shiny is even brought in.

So what are the options? Looking at the AECB heat demand, a modern gas boiler (90% efficient) would be a good choice. For EnerPhit or PassivHaus, a small, cheap electric only system would probably become competitive, so consider an electric boiler (100% eff) or MVHR electric inline heater (95%). Then there are the more efficient but capital intensive options of Air Source (220% eff.) or even Ground Source (350% eff.) heat pumps. Let's add the capital expenditure to the mix, with a write-off time of 20 years: £ 0 for the MVHR inline heater as it is there anyway, £ 1000 for the electric boiler, £ 3000 for the gas boiler and £11'000 and £ 19'500 for the ASHP, GSHP respectively.

Taking it all together, I arrive at the following annual cost:


kWh/m2a kWh/year gas boiler electric boiler ASHP GSHP MVHR inline
AECB 40 3200 230.87 565.12 256.87 161.46 594.86
EnerPhit 25 2000 177.94 353.20 160.55 100.91 371.79
PassivHaus 15 1200 142.65 211.92 96.33 60.55 223.07


captial writeoff 20 years 275.00 175.00 550.00 975.00 0

The capital costs are a large part of the annual total, and dwarf the consumption figures in the case of heat pumps. For PassivHaus standard the actual amounts are low anyway so any method is fine. Anything above that and direct electric is ruled out.
With the (unfair?) price difference between gas & electric, the gas boiler wins for anything not as good as PassivHaus. 
Subsidies could reduce the capital cost for heat pumps, and should I have had £ 20k in a sock somewhere it would have been nice to invest in a GSHP as it is more efficient and could be driven from renewables in principle. But if you have to take out extra mortgage to install one it is probably not worth it.

Considering the CO2 cost of a well insulated warm house, assuming a CO2 production of 220g for burning a kWh of natural gas, and 520g for extracting a kWh of electricity from the UK grid:


kg CO2 gas boiler electric boiler ASHP GSHP
AECB 782 1664 756 475
EnerPhit 489 1040 473 297
PassivHaus 293 624 284 178


CO2 wise, as well as annual consumption cost wise, the gas boiler is on par with the air-source heat pump in this calculation, where the ASHP has a much higher capital outlay. So not such a bad decision after all, at this point in time. Phew.

With the upgrade to a low temperature heating system it will be relatively easy to replace the new boiler with a heat pump once it has reached the end of its life, hopefully it will make more financial sense, and the UK grid will have decarbonised a bit more by then to drive down the CO2 footprint

Thursday, November 22, 2018

Fitting the GBS Performance side door


The side door of the house was inward opening, clashing with the cupboard-under-the-stairs access door as well as the bathroom entrance, and sweeping across the tiny corridor. An outward opening door would solve these problems so this was included with the order for the extension door set and windows. The door is from the Green Building Store Performance range, with triple glazed panel and a U value of 0.8 W/m2K.

This fine door has been sitting around in our house for more than a year, and finally I got fed up with it being in the way, and me thinking the fitting through over and over again so that on 10 November I decided to finally just do it. It was going to be a nice day, and if winter decided to come knocking it could take until March to get this job done.

The old door was fitted with steel lugs sunk in the frame so unfortunately the saw and angle grinder had to come out to get it removed.

The door is projected out into the EWI layer with the inside of the door flush with the pre-EWI outside. It is resting on 100mm of CompacFoam200, bolted to the outer leaf with 3 stainless M8 studs with counterplates and lock nuts on the inside, and recessed EWI fixings heads, washers & locknuts on the outside. The CompacFoam was buttered with Parabond adhesive before mounting and looking at the adhesive being squeezed out when tightening the nuts was very reassuring.
The door was fitted with a 18mm marine ply head plate and straps at the sides. these were all screwed to the masonry on the inside. Although an all around plywood/OSB box makes achieving airtightness easier, it would have reduced the door size even further as the structural opening size is of course fixed.
Bricks of the outer leaf are folded back and where they meet the inner leaf it is all less than perfect and very uneven, making an airtight seal to the door a challenge. In the end, Siga Majpell 5 airtightness membrane was taped to the door and folded over the brickwork, then  covered with 6mm OSB, shaped to level out the wall. Insulated plasterboard was screwed to the OSB, leaving the inner reveal smooth and hopefully well insulated.

The door closes with a reassuring thud and the inside stays free of condensation and I feel no drafts so I am happy. The airtightness foil is taped to the masonry, and where possible buried in render or plastered over.

I have not got much of an idea yet how to make it all look nice in the end, but with the MVHR taking most of the door head out of sight anyway it is not time to call in the plasterers just yet.

Wednesday, November 21, 2018

Compression strength of (floor) insulation

I was not sure what insulation to select for under the screed floor in the living room. The thickness needed to be somewhere between 250 and 300mm, and I had lots of 200mm white EPS70 board I did not know what to do with. For the flooring in the old kitchen and extension, Floormate XPS300 was used, which is not cheap, not off the shelf for most building merchants and probably OTT unless I want to turn the house into a storage facility and drive around with a forklift.
Anyway, a quick collate of information from some specification sheets I arrive at:


lambda σ(inst) σ(long term) remarks

W/mK kPa kPa
EPS70 0.031 70 30 guesstimated σ(long term) from other EPS products
XPS300 0.033 300 130
Compacfoam200 0.087 2560 1910
Celotex XR4000 0.022 140 60 guesstimated σ(long term)

Of course this has to take the weight of the screed as well. Assuming a density of 2.5(x10^3 kg/m3), 100mm screed weighs 250 kg/m2 or exerts a pressure of 2.5 kPa. So despite me worrying, EPS70 is absolutely fine for normal floors, which should have a 500 kg/m2 rating. Although EPS70 is strong, it is not very good with point loads, you can make permanent dents by poking it with your finger. Although the top screed should spread the load evenly, 80mm Celotex was used for the top layer. It is stronger, has foil backings on top and bottom which acts as a vapour barrier and is good for clipping on the UFH pipes, and the low lambda brings down the U value even further. The final lay-up has a U of  0.1 W/m2K, which should be good enough for (almost) anybody.

BTW: I am not sure about the relevance, but the whole lay-up of floor and screed should just about float.

Tuesday, November 20, 2018

First Post

Hopefully this will be the start of documenting the things that were done to the house we live in to make it bigger, more comfortable and more energy efficient.
I tend to think the largest part of the work has been completed by now, and some of it probably deserves documenting if only for me to look back on.