Thursday, November 22, 2018

Fitting the GBS Performance side door


The side door of the house was inward opening, clashing with the cupboard-under-the-stairs access door as well as the bathroom entrance, and sweeping across the tiny corridor. An outward opening door would solve these problems so this was included with the order for the extension door set and windows. The door is from the Green Building Store Performance range, with triple glazed panel and a U value of 0.8 W/m2K.

This fine door has been sitting around in our house for more than a year, and finally I got fed up with it being in the way, and me thinking the fitting through over and over again so that on 10 November I decided to finally just do it. It was going to be a nice day, and if winter decided to come knocking it could take until March to get this job done.

The old door was fitted with steel lugs sunk in the frame so unfortunately the saw and angle grinder had to come out to get it removed.

The door is projected out into the EWI layer with the inside of the door flush with the pre-EWI outside. It is resting on 100mm of CompacFoam200, bolted to the outer leaf with 3 stainless M8 studs with counterplates and lock nuts on the inside, and recessed EWI fixings heads, washers & locknuts on the outside. The CompacFoam was buttered with Parabond adhesive before mounting and looking at the adhesive being squeezed out when tightening the nuts was very reassuring.
The door was fitted with a 18mm marine ply head plate and straps at the sides. these were all screwed to the masonry on the inside. Although an all around plywood/OSB box makes achieving airtightness easier, it would have reduced the door size even further as the structural opening size is of course fixed.
Bricks of the outer leaf are folded back and where they meet the inner leaf it is all less than perfect and very uneven, making an airtight seal to the door a challenge. In the end, Siga Majpell 5 airtightness membrane was taped to the door and folded over the brickwork, then  covered with 6mm OSB, shaped to level out the wall. Insulated plasterboard was screwed to the OSB, leaving the inner reveal smooth and hopefully well insulated.

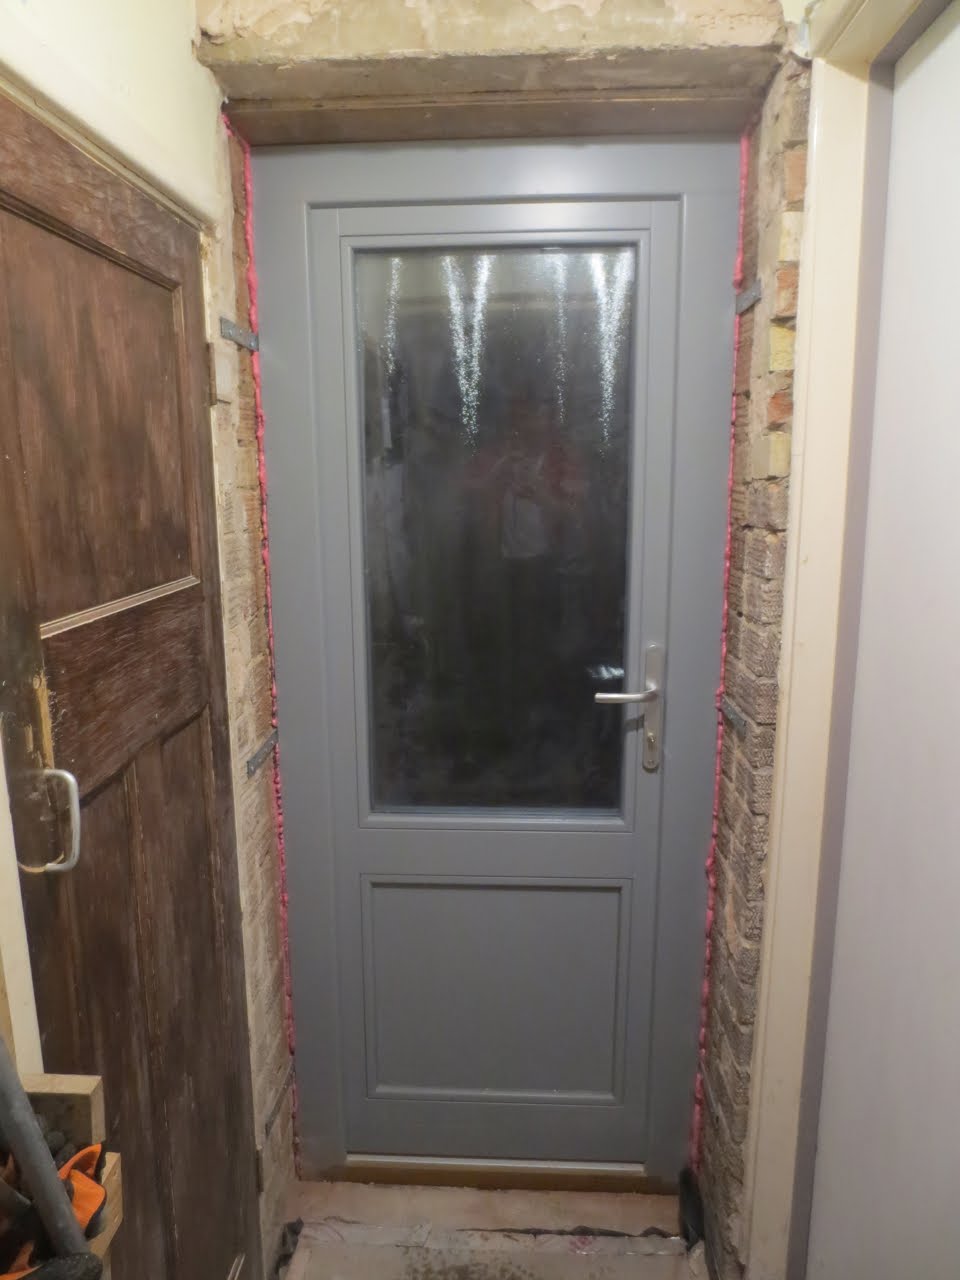
The door closes with a reassuring thud and the inside stays free of condensation and I feel no drafts so I am happy. The airtightness foil is taped to the masonry, and where possible buried in render or plastered over.

I have not got much of an idea yet how to make it all look nice in the end, but with the MVHR taking most of the door head out of sight anyway it is not time to call in the plasterers just yet.

Wednesday, November 21, 2018

Compression strength of (floor) insulation

I was not sure what insulation to select for under the screed floor in the living room. The thickness needed to be somewhere between 250 and 300mm, and I had lots of 200mm white EPS70 board I did not know what to do with. For the flooring in the old kitchen and extension, Floormate XPS300 was used, which is not cheap, not off the shelf for most building merchants and probably OTT unless I want to turn the house into a storage facility and drive around with a forklift.
Anyway, a quick collate of information from some specification sheets I arrive at:


lambda σ(inst) σ(long term) remarks

W/mK kPa kPa
EPS70 0.031 70 30 guesstimated σ(long term) from other EPS products
XPS300 0.033 300 130
Compacfoam200 0.087 2560 1910
Celotex XR4000 0.022 140 60 guesstimated σ(long term)

Of course this has to take the weight of the screed as well. Assuming a density of 2.5(x10^3 kg/m3), 100mm screed weighs 250 kg/m2 or exerts a pressure of 2.5 kPa. So despite me worrying, EPS70 is absolutely fine for normal floors, which should have a 500 kg/m2 rating. Although EPS70 is strong, it is not very good with point loads, you can make permanent dents by poking it with your finger. Although the top screed should spread the load evenly, 80mm Celotex was used for the top layer. It is stronger, has foil backings on top and bottom which acts as a vapour barrier and is good for clipping on the UFH pipes, and the low lambda brings down the U value even further. The final lay-up has a U of  0.1 W/m2K, which should be good enough for (almost) anybody.

BTW: I am not sure about the relevance, but the whole lay-up of floor and screed should just about float.

Tuesday, November 20, 2018

First Post

Hopefully this will be the start of documenting the things that were done to the house we live in to make it bigger, more comfortable and more energy efficient.
I tend to think the largest part of the work has been completed by now, and some of it probably deserves documenting if only for me to look back on.